Students Can Use Zoom to Record Projects…
![]()
Need a way for students to record their screen or presentation?
Students can go into their own Zoom session, record the session locally / to their computer*, and share that file via Google Drive, YouTube, Dropbox, etc.
*(WFU Student Zoom accounts can record locally.
WFU Faculty and Staff Zoom accounts can record locally or to the cloud.)
Directions for students:
1–Request your WFU Zoom account and download the Zoom Desktop App if you have not yet done so, at https://software.wfu.edu/software/zoom/
2–Configure your recording settings in the Zoom Desktop App:
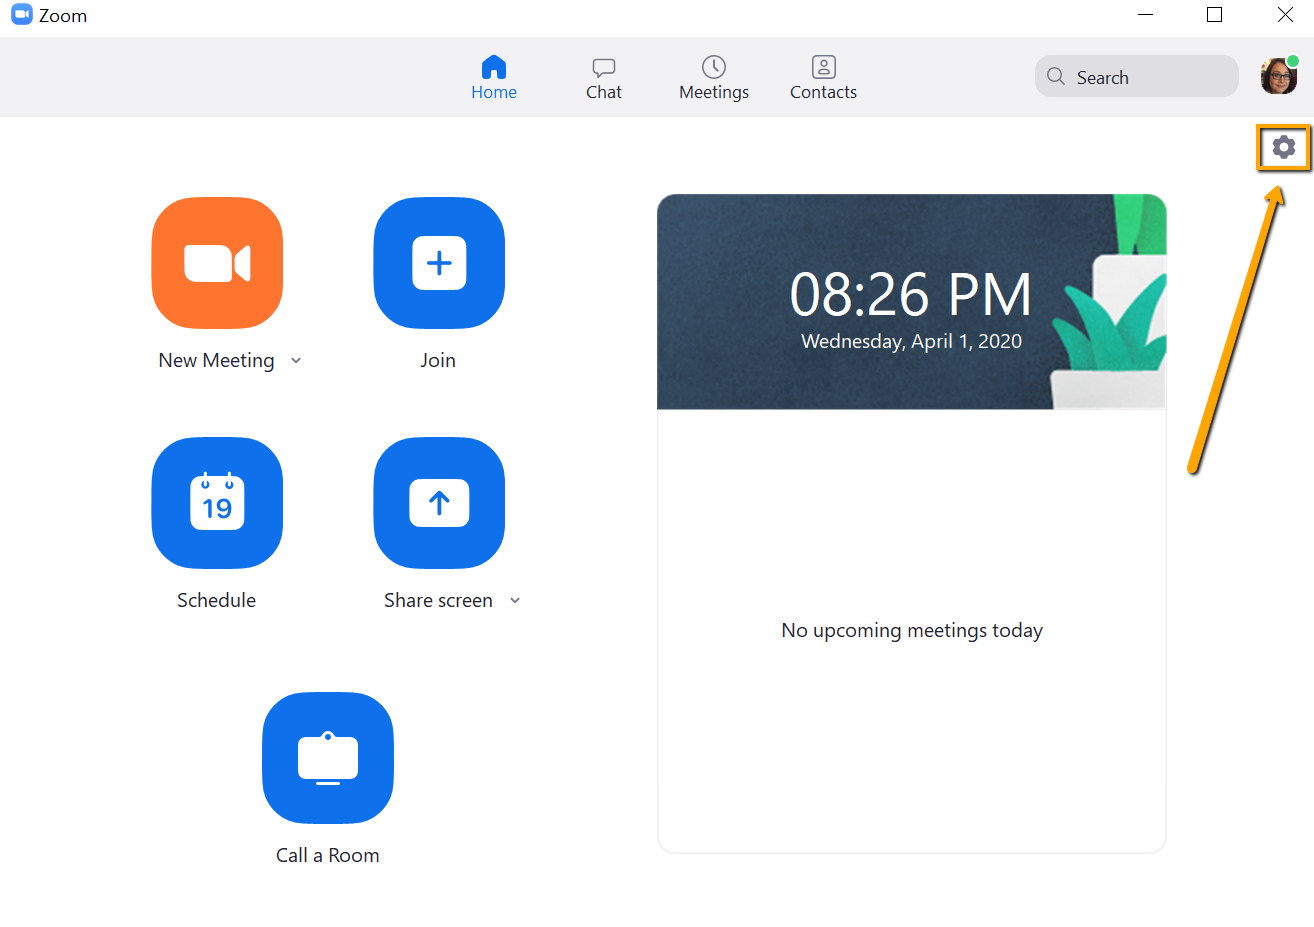
Click Settings (the gear wheel) at the top right:
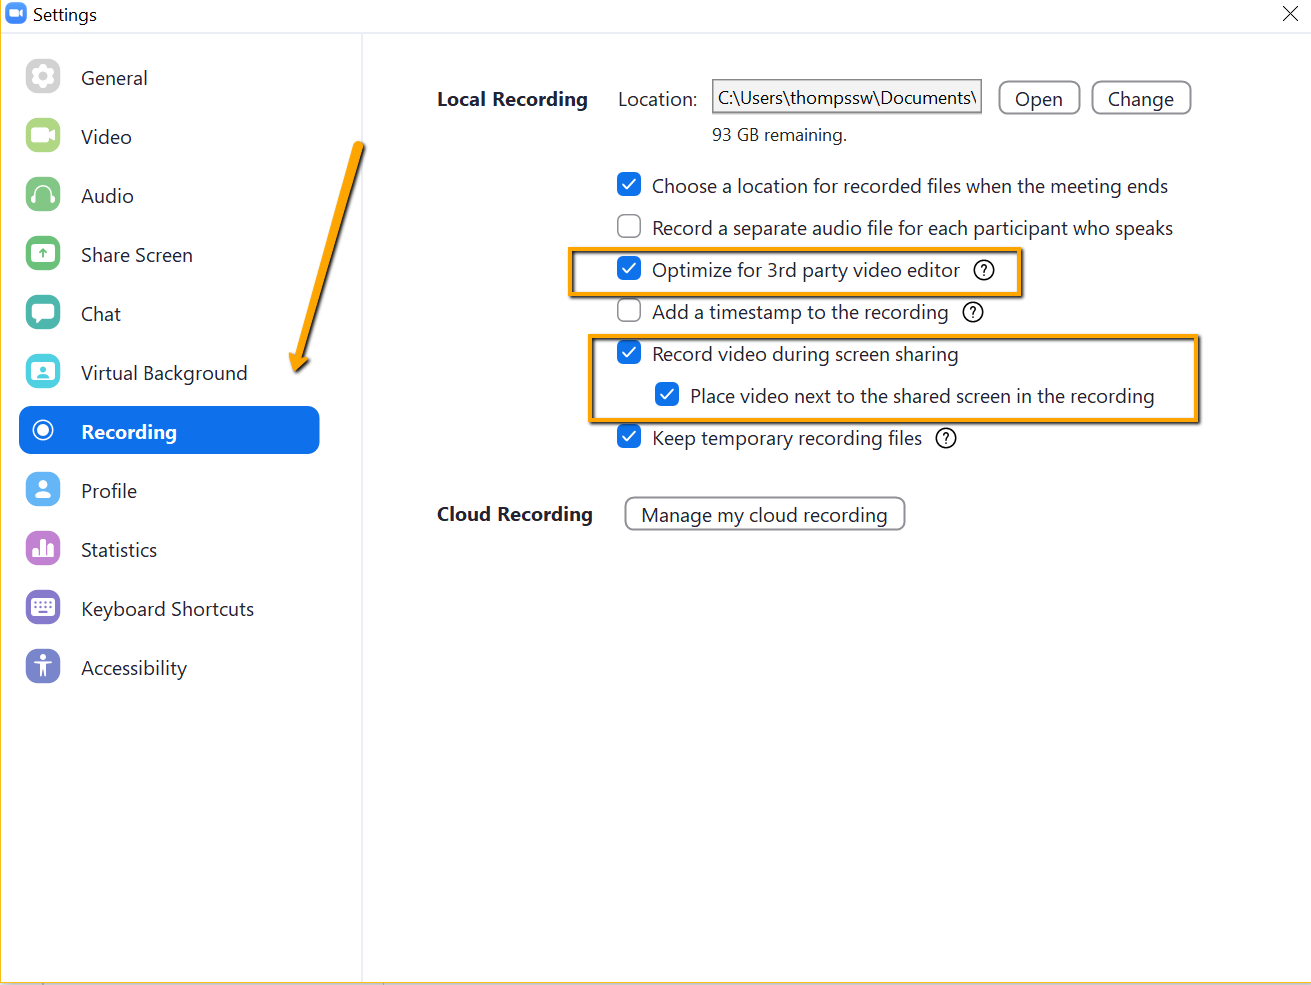
Then click Recording on the left and choose your settings:
–Be sure to check “Optimize for 3rd party video editor.”
–If you’d like your video to be in the recording when you screenshare, check that box. Check the additional box to place your video next to your screen share.
3–Prepare what you want to present.
Turn off any messaging or other apps that might have pop up windows.
Put your cell phone on silent mode / make sure you have a quiet environment.
4–Start a Zoom session, connect your audio (and video if you choose), lock the session.
Begin screensharing.
Hit Record.
Just do a short recording test first.
Stop the recording. End the Zoom session. Wait for your computer to process / convert the file. Locate the MP4 file and play it.
Make sure your audio is clear and that the recording interface looks the way you expected.
Try a bluetooth earbud / headset vs. the built-in mic to see which sounds better in your recordings.
Then do the full recording.
See more information about Zoom Local Recording.
TIPS:
If you need to zoom in and out on a PPT presentation or PDF or website:
Hit CTRL and + (plus) on your keyboard to zoom in
and CTRL and – (dash) to zoom out
and CTRL and 0 (zero) to return to normal size
And use the “hand” icon to move around the screen
(On a Mac, use Command instead of CTRL.)
You can edit your video file with a video editing software.
You can upload your MP4 to Google Drive, YouTube, Dropbox etc. to share it.
(If you upload to YouTube, YouTube auto captions it to make it more accessible. If you’d like to make any edits to the captions, here’s how you can go in and edit your YouTube video’s captions).
Categories: Remote Teaching, Zoom