Qualtrics – Google Sheet Integration
The new Google Sheets Integration add-on in Qualtrics allows you to view near real time data in your Google Sheet as submissions are being recorded for your survey. Here are step by step instructions on how to establish a connection with your Google Sheet.
- Best Practice – Go ahead and create your Google Spreadsheet. Give it a file name and add your headers to the columns. These headers will be needed to map the survey responses to the corresponding column.
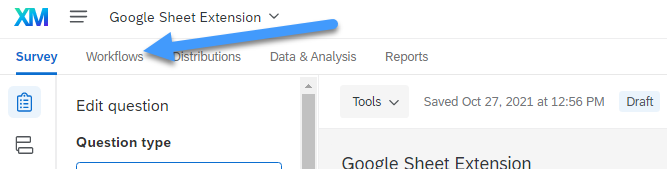
- Once your survey is published and ready for distribution, click on the Workflows menu item.

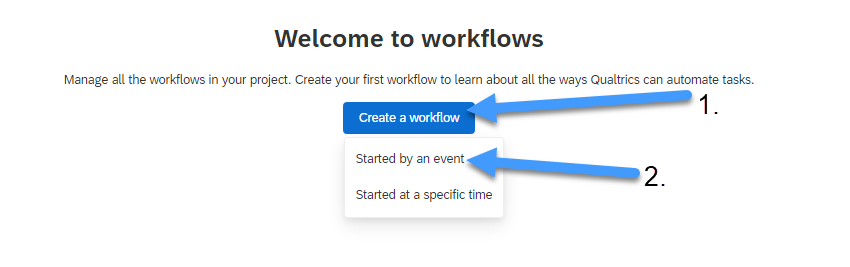
- Click on the blue Create a Workflow button and then click started by an event.

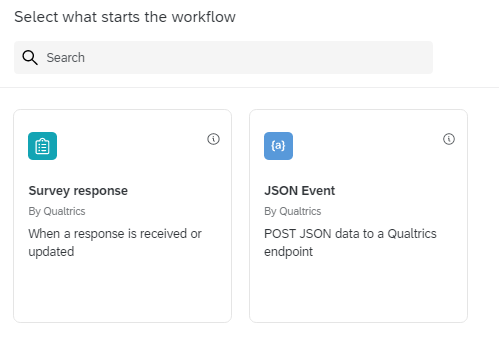
- Select Survey Response option.
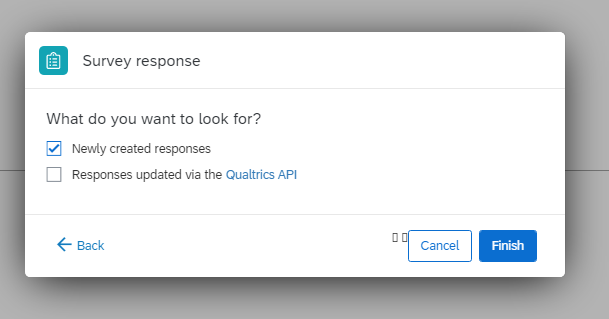
- Choose Newly Created Responses and then click Finish.


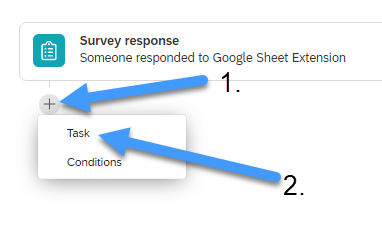
- Underneath the Survey Response item that has just been added to your workflow, click on the plus “+” icon below and choose Task.

- Select the Google Sheets app from the list.
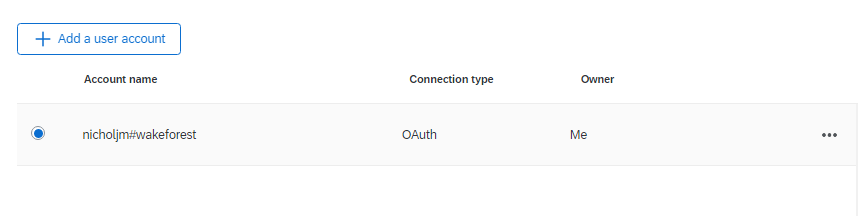
- At this point you will need to make a one time connection to your Google Drive so click Add a User Account. If you have already done this proceed to step #10.
- Give the account a name and click Connect Account. At this point you will be asked to choose a Google Account that you want associated with this name. Choose your wfu.edu account and then follow the prompts. Once signed in click Continue.
- Click the radio button by your connected account name and click Next.
- Select the Google Sheet you would like to use. **** while you can create a new google sheet at this time, best practice is to create the sheet ahead of time*******

- Select the Sheet where you want data to be written to.
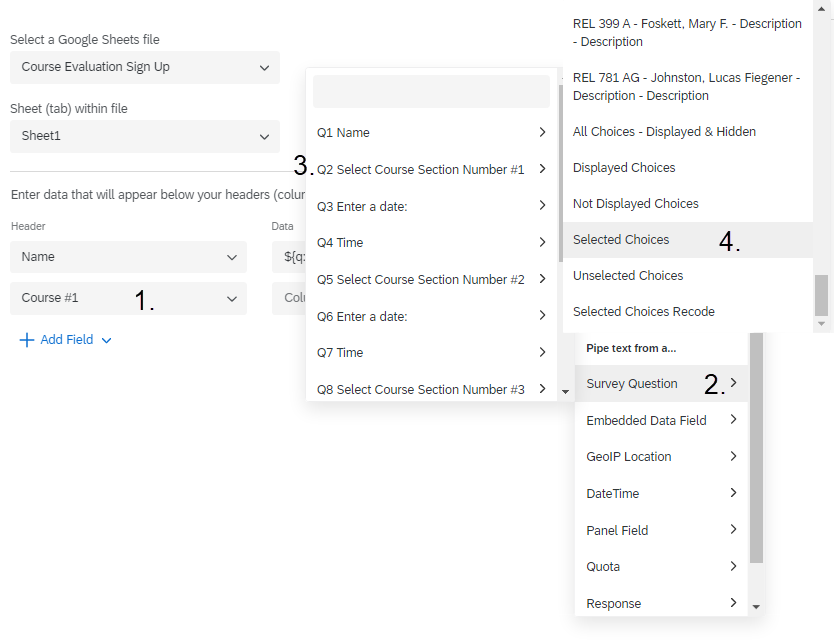
- Click the Add a Field button and you will see a list of the headers you created in your Google Sheet. You can choose to add one field/header at a time or you can add all fields at one time.

- Once the fields are added, click the bracketed “a” {a} to the right under the data column. This is where you will map the header to the question in your survey. In the drop down menu, select the question you want to associate the header with. After the question has been selected, depending on the question type, choose either Selected Choices or the actual question title. Do this for each header. See example below.

- Click Save once completed. If the Save button is not active, that means you have a field not mapped to a header.
- Click Save
- Once the survey is distributed, open up your Google Sheet and watch the submissions being written in near real-time.
Important Points to Keep in Mind
- If you delete responses from the Google Sheet it does not delete them in Qualtrics.
- If you delete responses in Qualtrics, it does not delete them from the Google Sheet.
- If your survey is designed so that a person can submit multiple times, it does not write over their original responses. It just adds a new line of data in the Google Sheet.

Categories: Google, Google Sheets, Qualtrics