Kaltura – Closed Captioning Editor
One advantage to uploading your videos to Kaltura instead of Google Drive is that Closed Captioning (CC) text is automatically created and applied. For the most part, Kaltura does a good job of recognizing your pronunciation and transcribing the words correctly. However, the transcription is never 100% accurate and may need some corrections.
Editing the Closed Captioning for a video in Kaltura
To edit the CC of your video, start by logging into your Kaltura account and browse to the media page for the video that you would like to edit.
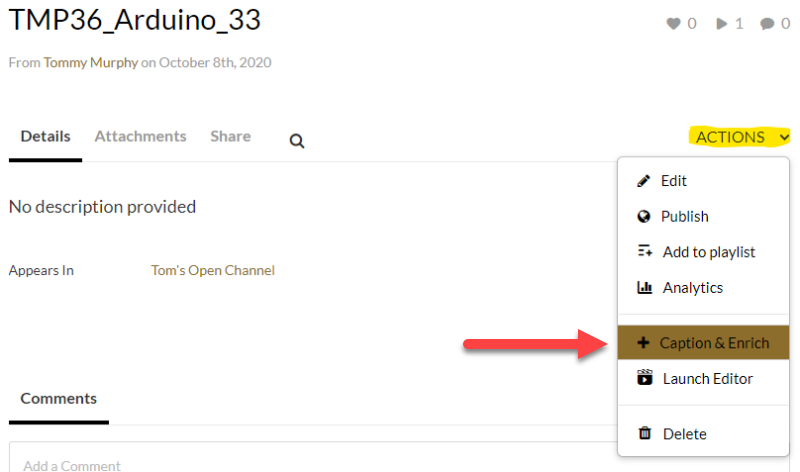
On the media page for the selected video, click the Actions dropdown menu and then the Captions and Enrich button.
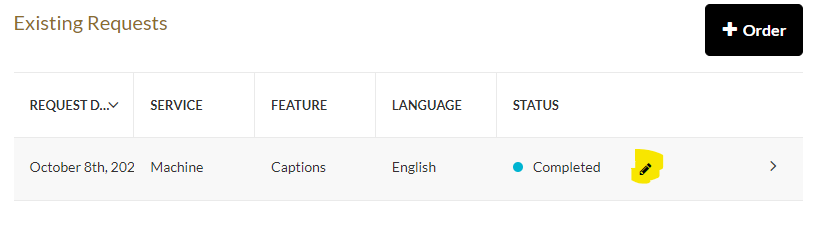
Under the Existing Requests, click the edit button (pencil) for the CC file that you would like to edit.
You are now presented with the Closed Captions Editor interface.

The Editor Interface Tools
Lets take a closer look at the tools available in the CC Editor.
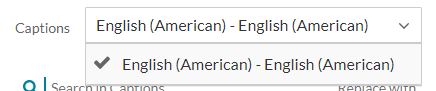
The Closed Caption File Selector
If you have multiple CC files, you can change which file to edit.
The Global Search and Replace tool
Use this tool to correct capitalizations of words or to correct a word/phrase that the auto captioning tool consistently got wrong.

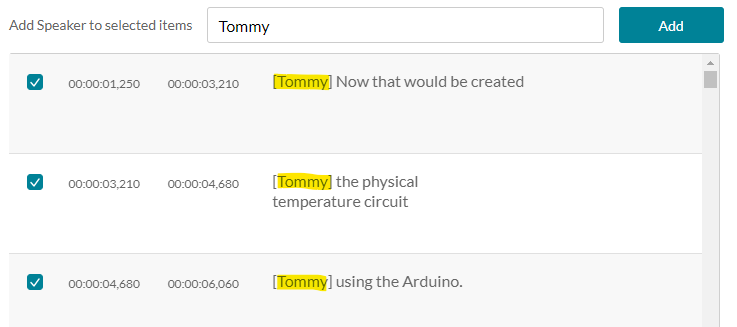
The Speaker Identification tool
If there are multiple speakers in the video, you can use this tool to “bulk” identify specific CC items. Just place a check in the box next to the timeline items that you would like to tag, Add the Speaker name to the text box, and click the Add button.
The CC Timeline and Video Player
The timeline and video player are synchronized and work together in the editing process. There are a couple of approaches to editing the CC text.
First, if the video script is fresh in your mind and you can easily remember the correct wording, you can just scroll down the timeline and edit the text as you scroll. If you see a timeline entry that needs correcting but you are unsure of the wording that was used in the video, click into the textbox on the timeline and then click the play button on the video player. The video should jump straight to the corresponding timestamp and start playback so that you can hear the spoken words. When you have made the necessary changes, continue down the timeline.
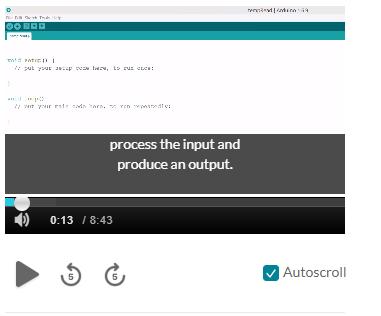
ou can also click the play button on the player and the video and caption timeline will play in sync with each other. As you see a caption that needs updating, simply click in in the corresponding caption textbox and type to edit. The video should stop playing and wait until you click play again. The video player also has buttons to jump forward and backward 5 seconds and a checkbox to stop the auto-scroll of the timeline.
Saving
When you have completed scrolling through the timeline, it is important to remember to click the Save button to avoid losing your work. For a long video, it is a good idea to click save often during the editing process. The Revert link will undo all changes since your last save, so use cautiously.

Alternate Approach
I have found that editing the captioning of a long videos using the Kaltura CC Editor to be somewhat of a tedious workflow for me. So, my technique is to download the CC file (a *.srt file type) and edit it using my local text editor, Notepad for PC and Textedit for Mac. I will play the video in separate window while editing the captioning with the text editor. After completing the changes, I then upload the new file to the media page and delete the original capture file (after backing it up of course).
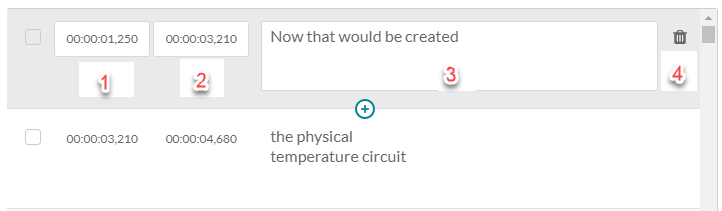
The text in the *.srt file looks like the example below. If you examine the first three lines, you will see an integer indicating the CC item number (1). The next line is the start (00:00:01,250) and end (00:00:03,210) video timestamps for the CC item. Finally, the next line, or two, is the CC text that will appear in the video (Now that would be created) . The pattern repeats for each successive CC item.
[su_box title=”SRT Code:” style=”noise” box_color=”#333333″ title_color=”#FFFFFF” radius=”3″ class=””]
1
00:00:01,250 –> 00:00:03,210
Now that would be created
2
00:00:03,210 –> 00:00:04,680
the physical temperature circuit
3
00:00:04,680 –> 00:00:06,060
using the Arduino.
[/su_box]
[su_box title=”TIP:” style=”noise” box_color=”#333333″ title_color=”#FFFFFF” radius=”3″ class=””]
Editing the CC file in your local text editor also allows you to delete larger sections of CC items in bulk instead of the single item-by-item deletion found in the CC Editor. This can be useful for when the automatic CC transcription turns musical notes into words. The missing item numbers do not affect the CC once re-uploaded.
[/su_box]
Downloading and Uploading Captions Files
To download the *.srt file, go to the media page, click the Actions dropdown, and then the Edit button.

Then on the media edit page click the Captions tab.

On the Captions tab, you can:
- Make a captions file the default for the video when there are more than one.
- Delete a captions file.
- Download a captions file.
- Upload a new (updated) captions file.
One advantage to uploading your videos to Kaltura instead of Google Drive is that Closed Captioning (CC) text is automatically created and applied. For the most part, Kaltura does a good job of recognizing your pronunciation and transcribing the words correctly. However, the transcription is never 100% accurate and may need some corrections.
Editing the Closed Captioning for a video in Kaltura
To edit the CC of your video, start by logging into your Kaltura account and browse to the media page for the video that you would like to edit.
On the media page for the selected video, click the Actions dropdown menu and then the Captions and Enrich button.
Under the Existing Requests, click the edit button (pencil) for the CC file that you would like to edit.
You are now presented with the Closed Captions Editor interface.
Categories: Accessibility, Kaltura