Flipgrid Tips and Tricks for Faculty
What is Flipgrid?
Flipgrid is a video discussion tool.
What does that mean?
Flipgrid allows students to use video or text as responses to the topic of a discussion. This is a digital forum where rich interactions can take advantage of the cameras and screens we carry around with our phones and on our laptops. It has an easy-to-use small suite of video tools to enable students to engage with discussion topics.
Where and How do I access it?
Flipgrid can be used via a Canvas Integration or Directly from the Flipgrid website.
Canvas Integration and Using the Flipgrid Website both require creating an account via the Flipgrid website before use.
[su_accordion]
[su_spoiler title=”Sign Up on Flipgrid Website” open=”no” style=”default” icon=”plus” anchor=”” class=””]
See a video from flipgrid here:
https://blog.flipgrid.com/gettingstarted
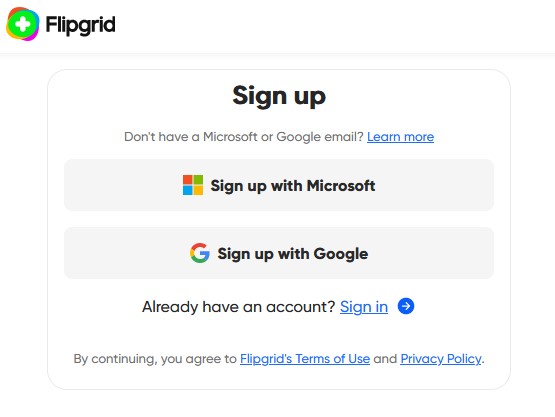
1) The Flipgrid signup page
⚠ It is recommended that you are signed into your WFU Gmail account before using these instructions.
![]()
2) Select “Signup with Google”
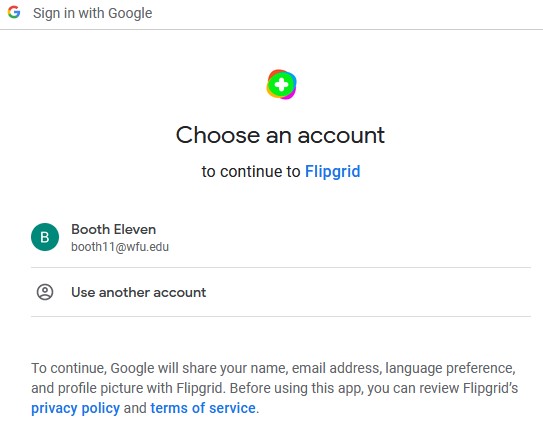
3) Choose your wfu@edu google account.
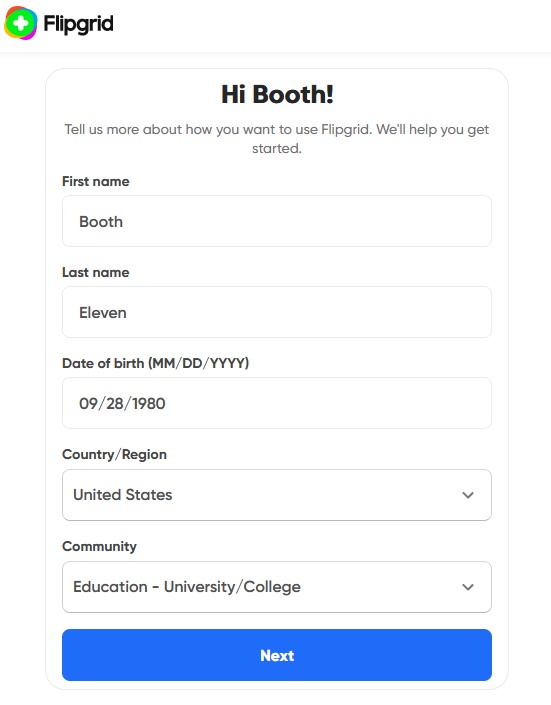
4) Enter Information for Flipgrid Account
First name, Last Name, Date of Birth, Country, and Select Education – University/College for the Community Field.
You’re Ready!!!
You can now continue to any instructions for using Flipgrid.

[/su_spoiler]
[su_spoiler title=”Canvas Integration” open=”no” style=”default” icon=”plus” anchor=”” class=””]
Instructions for using the WFU Canvas Integration of the Flipgrid App can be found on the canvas.wfu.edu website here: https://canvas.wfu.edu/2021/10/whats-new-in-canvas-october-2021/
Your ITG is always a great source of assistance for setting up Flipgrid. Feel free to send us an email or call for additional help or any road bumps along the way!
[/su_spoiler]
[su_spoiler title=”Use the Flipgrid Website” open=”no” style=”default” icon=”plus” anchor=”” class=””]
As the Instructor
⚠ Be sure you have signed up for a Flipgrid account first!
This page will show all the Flipgrids that you have created.
For the Students
⚠ Students also need to signup for an account!
This page will show students all the Flipgrid discussions they are currently participants in.
[/su_spoiler][/su_accordion]
Where can I find general training or instructions?
For Wake Forest College Faculty, your ITG can provide basic training to use Flipgrid. Specialists on teams around the college can assist in course development or advanced uses of Flipgrid if this is not your ITG Member’s specialty.
For all other Faculty and Staff at WFU outside of academic departments in the College, please reach out to the Bridge Service Desk to be connected with a specialist.
YouTube Videos
⚠ Technology platforms change rapidly. The following videos are curated to give brief overviews and may not provide sufficient instructions to use Flipgrid. Some features may differ from videos or no longer be available. Please contact an ITG for personalized training or updated resources.
[su_accordion]
[su_spoiler title=”Videos Selected October 2021″ open=”no” style=”default” icon=”plus” anchor=”” class=””]
https://www.youtube.com/watch?v=N9kMlyvCK3Q
[/su_spoiler][/su_accordion]
The Tips and Tricks
Flipgrid Custom Media Live
Flipgrid allows custom media (images) to be uploaded and moved around live during recording. This could be used for creating animations or showing how things interact.
[su_accordion]
[su_spoiler title=”How to Insert Custom Media” open=”no” style=”default” icon=”plus” anchor=”” class=””]
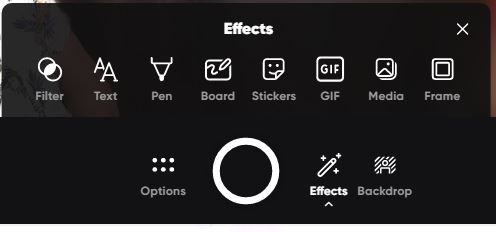
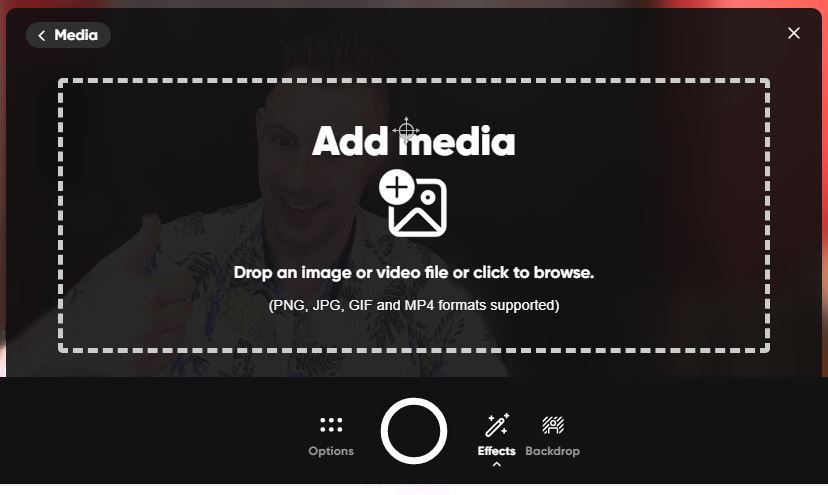
1) Click Effects, then Media
While recording a response in Flipgrid, there is a menu to the right of the white “record circle”. Select “Effects.” From the resulting menu that pops up above, select “Media.”
2) Click the Add Media
Once you have selected “Media” in the previous menu, a large box will appear for you to click “Add media.” Alternatively you can drag and drop files onto this large dashed-bordered area.
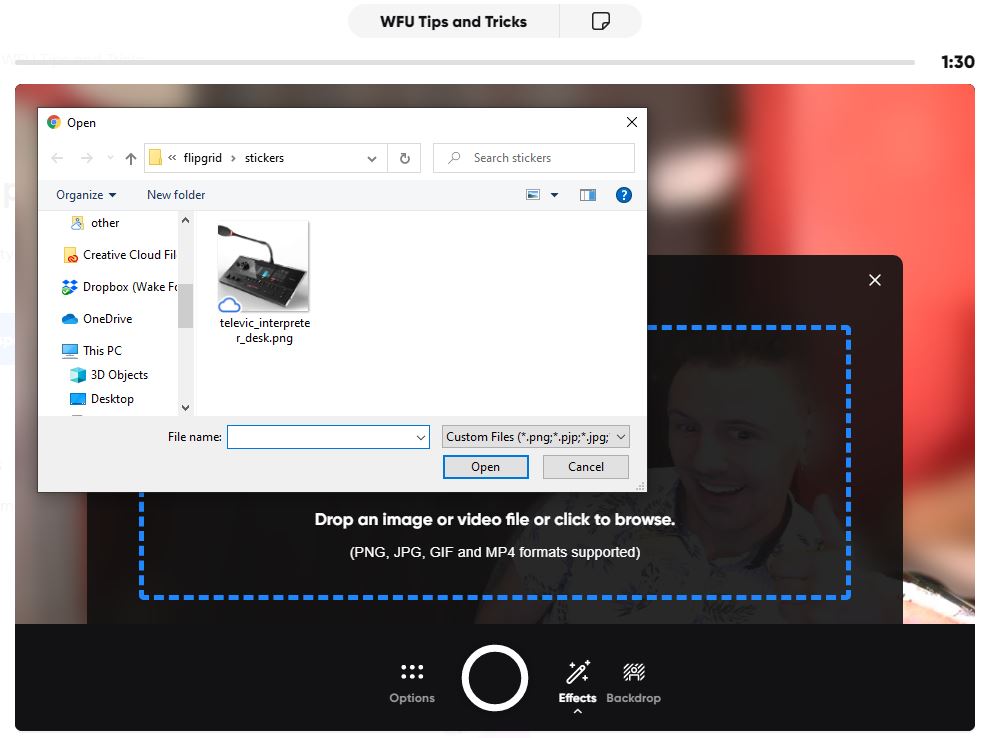
3) Select Image to Insert
⚠ This step only applies if “Add Media” was clicked. If drap-and-drop was used, this dialogue box will not appear.
You will be presented with your browser or operating system’s dialogue box to select a file from your computer.
Select the file, then click “Open.”
[/su_spoiler]
[/su_accordion]
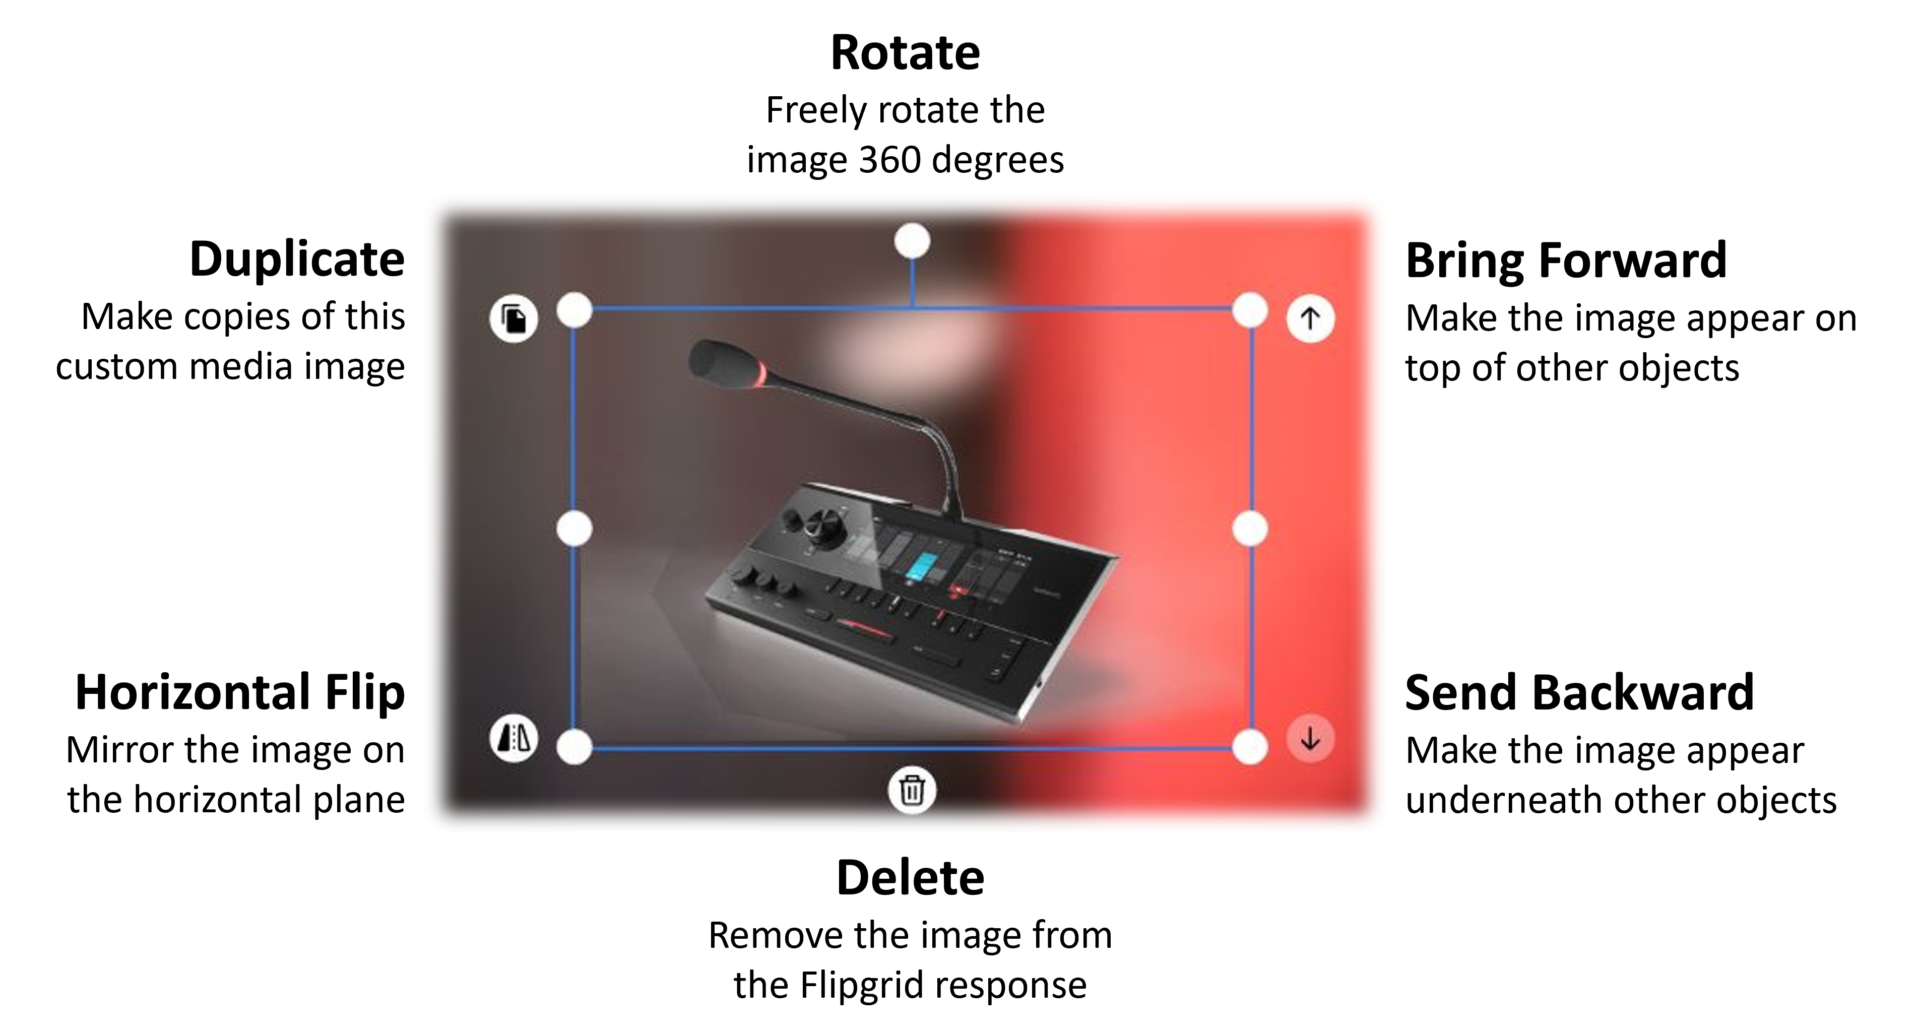
Edit Custom Media
Flipgrid allows re-sizing, horizontal flipping, and rotation of custom media and stickers.
[su_accordion]
[su_spoiler title=”How to Insert Custom Media” open=”no” style=”default” icon=”plus” anchor=”” class=””]
1) Click Effects, then Media
While recording a response in Flipgrid, there is a menu to the right of the white “record circle”. Select “Effects.” From the resulting menu that pops up above, select “Media.”
2) Click the Add Media
Once you have selected “Media” in the previous menu, a large box will appear for you to click “Add media.” Alternatively you can drag and drop files onto this large dashed-bordered area.
3) Select Image to Insert
⚠ This step only applies if “Add Media” was clicked. If drap-and-drop was used, this dialogue box will not appear.
You will be presented with your browser or operating system’s dialogue box to select a file from your computer.
Select the file, then click “Open.”
[/su_spoiler]
[/su_accordion]
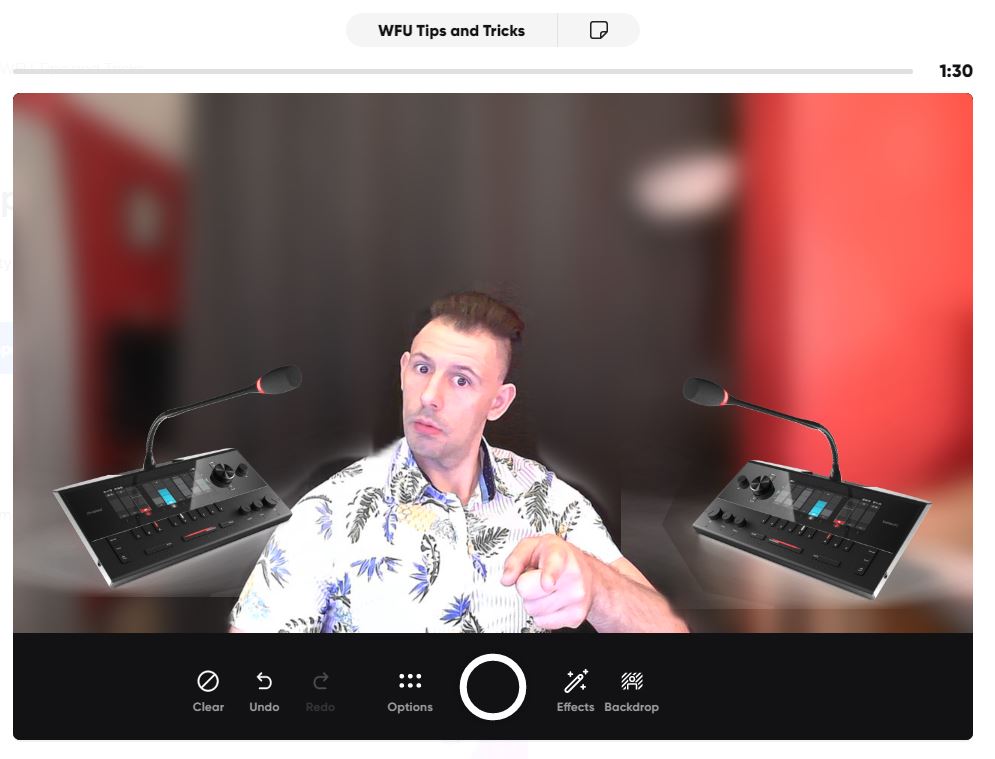
Above is an example after duplicating and horizontal flipping a piece of custom media.
Flipgrid Pause and Resume
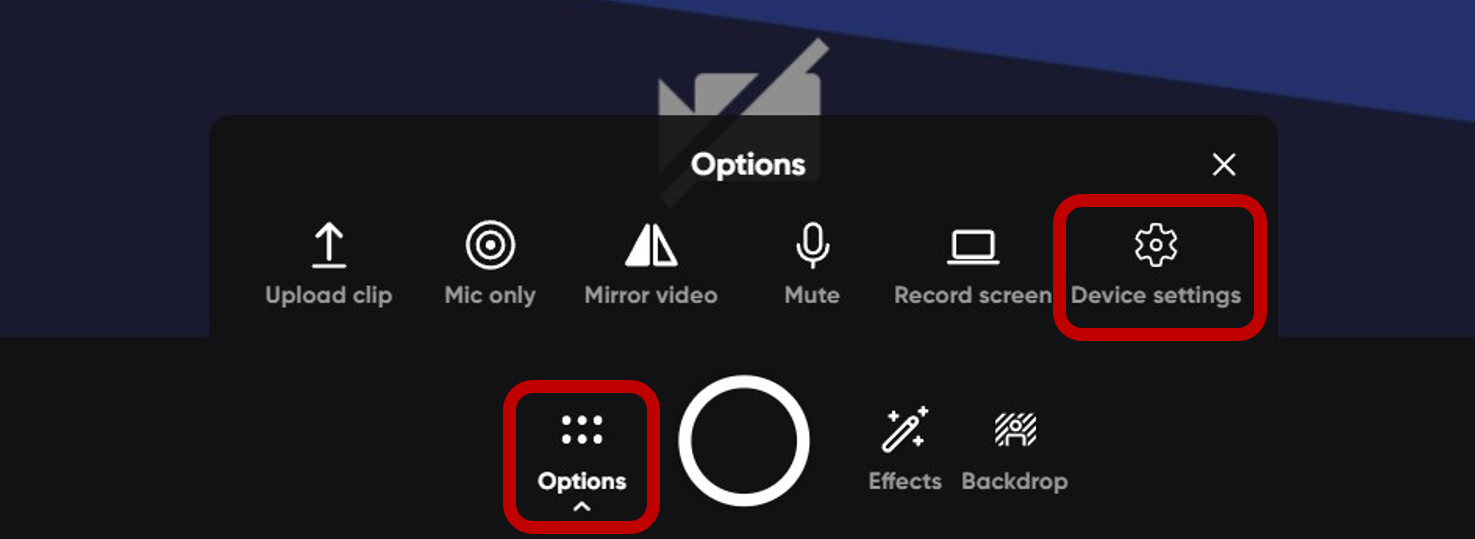
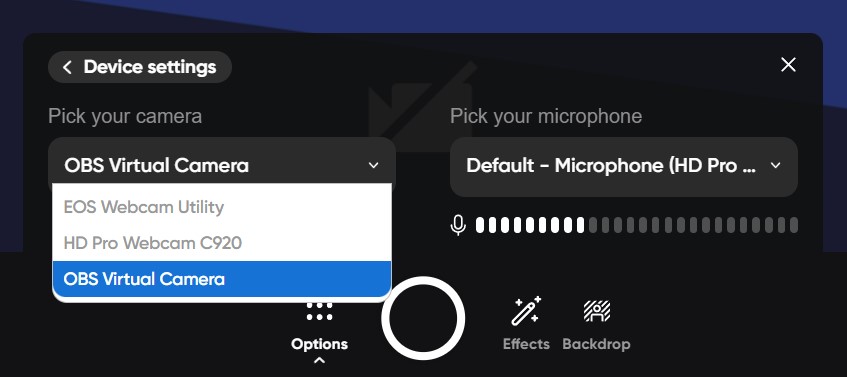
Switch to a Different Camera
In this age of Zoom and remote learning, we’ve added external webcams and sometimes even document cameras to our laptops. Flipgrid makes it easy to switch to a different camera. Combine with the “pause and resume” technique to smoothly use multiple cameras in the same video!
End of the post!
Please contact your ITG Member for additional assistance and learning opportunities with Flipgrid and all other instructional technology.
Categories: Flipgrid